Editing Workflow for Travel Vlogs on Mobile: Step-by-Step Guide
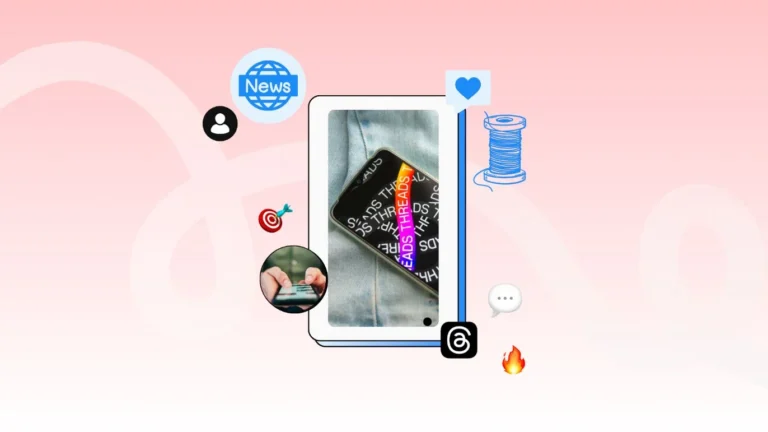
Travel vlogging has evolved from a niche hobby into a thriving digital content medium. Social media platforms like YouTube, TikTok, and Instagram have made it easier than ever for creators to share their adventures with a global audience. Mobile video editing apps, particularly CapCut Mod APK, have transformed smartphones into professional-grade editing tools, allowing creators to produce high-quality travel vlogs without expensive cameras or desktop software.
This comprehensive guide will walk you through a complete editing workflow for travel vlogs on mobile, covering everything from pre-edit planning to publishing. Each section is designed to help you save time, enhance creativity, and build credibility with your audience. Whether you are a beginner or an experienced creator, following these steps will elevate the quality of your travel vlogs.
Pre-Editing Planning: The Foundation of a Travel Vlog
Every successful travel vlog begins long before you open your editing app. Pre-editing planning is crucial because it ensures your story is coherent, visually compelling, and easy to follow. Without proper planning, your footage may end up disorganized, resulting in a vlog that feels chaotic and disjointed.
Key Steps:
-
Storyboard Your Shots: Create a rough outline of your vlog before filming. Decide which scenes you want to include, such as your journey to the destination, hotel experiences, meals, sightseeing, and sunset or drone shots. Storyboarding helps you capture the essential moments and prevents unnecessary footage.
-
Capture Multiple Angles: Film the same scene from different perspectives—wide shots for establishing the environment, medium shots for context, and close-ups for details. This variety allows you to select the most engaging visuals during editing.
-
Organize Footage by Day or Location: On your mobile device, create folders to separate footage based on location, day, or activity. This organizational step reduces confusion during editing and speeds up workflow, especially for longer trips with abundant content.
-
Plan Your Narrative Arc: Decide on the story structure. A typical travel vlog may follow an introduction, exploration, food experiences, cultural highlights, and conclusion. A clear narrative structure ensures your audience remains engaged throughout.
Pro Tip: Even a simple written outline or a few bullet points can save hours during editing and help you create a professional, engaging vlog.
Choosing the Right Clips
Selecting the right footage is one of the most critical aspects of travel vlog editing. Not every clip you capture will make it to the final cut. Learning to be selective ensures that your vlog remains engaging and visually appealing.
How to Choose the Best Clips:
-
Highlight Unique Moments: Focus on moments that stand out, such as stunning landscapes, cultural performances, or personal experiences. These clips help differentiate your vlog from others.
-
Trim Long Clips: Cut out unnecessary portions of your footage. For instance, long walking shots or repetitive scenery can slow down your vlog and lose viewer interest.
-
Check Stability and Clarity: Avoid using blurry or shaky footage unless intentionally creating a stylistic effect. Modern mobile apps like CapCut include stabilization tools that can fix minor shake issues.
-
Consider Story Contribution: Ask yourself if the clip advances your narrative or adds value. If it does not, it may be better to exclude it.
Pro Tip: Use CapCut’s “Favorites” feature to mark clips you want to keep, making it easier to reference them while editing.
Organizing Your Timeline
A well-organized timeline is essential for a smooth and professional-looking vlog. This stage focuses on structuring your footage in a logical and visually appealing sequence.
Steps to Organize Your Timeline:
-
Create a Rough Cut First: Arrange your selected clips in chronological order to create a basic story flow. Avoid adding transitions, effects, or text at this stage.
-
Separate Scenes with Markers: Divide your vlog into distinct sections, such as “Arrival,” “Exploration,” “Food and Dining,” and “Sunset Views.” Using markers in CapCut helps you navigate the timeline efficiently.
-
Balance Clip Duration: Ensure that no clip feels too long or too short. A balanced rhythm maintains viewer engagement and makes your vlog easier to watch.
-
Use B-Roll Strategically: Include supplementary footage to enhance storytelling. For example, show close-up details of a local market between wide shots of the city.
Adding Music and Audio
Audio is as important as visuals when creating travel vlogs. The right soundtrack sets the mood, enhances storytelling, and keeps viewers emotionally invested.
Best Practices for Music and Audio:
-
Choose Music That Matches the Location: Tropical beats for beach vlogs, soft acoustic for city strolls, or cinematic music for landscapes. The audio should complement the visual tone.
-
Sync Key Moments to Beats: Align important actions or transitions with the rhythm of your music. This technique creates an engaging, cinematic feel.
-
Include Natural Sounds: Background sounds, such as waves crashing, birds chirping, or local street noise, enhance immersion and make viewers feel like they are experiencing the location firsthand.
-
Adjust Audio Levels: Ensure that music does not overpower dialogue or natural sounds. CapCut allows precise audio mixing and fade-in/fade-out controls for professional results.
Pro Tip: Use royalty-free or CapCut-provided music tracks to avoid copyright issues while maintaining high-quality sound.
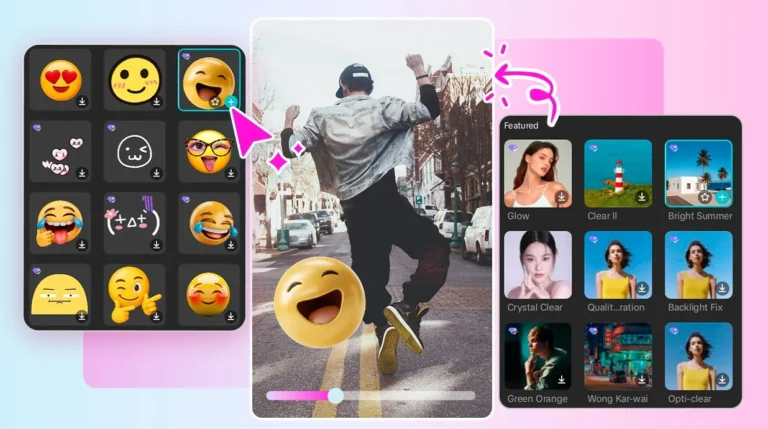
Applying Visual Enhancements
Enhancing visuals makes your vlog more captivating and professional. Mobile editing apps provide tools for color correction, filters, stabilization, and more.
Visual Enhancements to Consider:
-
Color Grading: Adjust contrast, brightness, and saturation to achieve a cohesive look across clips. Use color grading to evoke specific moods, such as warm tones for sunsets or cool tones for winter scenes.
-
Filters and LUTs: Filters can improve visual appeal but use them sparingly to maintain authenticity. LUTs (Look-Up Tables) can be applied for cinematic color tones.
-
Stabilization: Smooth out shaky clips for a polished appearance. CapCut’s stabilization feature is highly effective for handheld shots.
-
Crop and Frame Adjustments: Focus on essential elements in each shot. Proper framing ensures viewers notice the key subjects without distractions.
Pro Tip: Subtle visual enhancements make a vlog look professional without over-editing, maintaining credibility and authenticity.
Adding Text, Captions, and Subtitles
Text overlays guide your viewers and provide valuable context, particularly when filming in foreign locations or sharing travel tips.
Tips for Effective Text Usage:
-
Introduce Locations: Overlay location names on your clips to help viewers follow your journey.
-
Highlight Key Information: Add tips, cultural insights, or fun facts in short, readable text blocks.
-
Use Readable Fonts and Sizes: Choose fonts that complement your vlog style while ensuring clarity. Avoid overly decorative fonts that are difficult to read.
-
Include Subtitles for Dialogue: If your vlog includes interviews or commentary, subtitles increase accessibility and engagement, especially for social media platforms where sound is often muted.
Transitions and Effects
Transitions enhance flow and make your vlog feel cinematic. However, overusing them can distract viewers from your content.
Recommendations:
-
Simple Cuts for Storytelling: Basic cuts work best for most narrative sequences, preserving realism.
-
Creative Transitions for Highlights: Swipe, zoom, or fade transitions can accentuate key moments like scene changes, sunrise reveals, or event highlights.
-
Consistency is Key: Stick to a few transition styles for your vlog to avoid visual chaos.
-
CapCut Templates: Use pre-made templates for quick and professional transitions without spending hours on custom effects.
Pro Tip: Keep transitions smooth and purposeful to maintain a professional feel while supporting your narrative.
Exporting for High Quality
Exporting is a critical step. A high-quality vlog ensures your content looks polished across all platforms, from YouTube to Instagram.
Best Export Practices:
-
Resolution: Use 1080p for most platforms. Consider 4K if your device and platform support it for maximum clarity.
-
Frame Rate: 30fps is standard. Use 60fps for action sequences or drone footage for smoother motion.
-
Format: MP4 is widely compatible and balances quality with file size.
-
Bitrate: Adjust bitrate settings to prevent loss of detail while keeping file sizes manageable.
-
Preview Before Publishing: Always check your exported video for glitches, audio issues, or color inconsistencies.
Pro Tip: Maintaining high export quality strengthens your credibility as a professional content creator.
Publishing and Optimization
Once your travel vlog is ready, effective publishing ensures it reaches a wide audience and gains traction.
Optimization Tips:
-
Engaging Thumbnails: Create bright, clear thumbnails that accurately represent your content. Include key elements like location and activity.
-
SEO-Friendly Titles and Descriptions: Include keywords like the destination name, activity, or vlog type. Example: “Exploring Bali’s Beaches | Travel Vlog 2026.”
-
Use Hashtags and Tags: Hashtags increase discoverability on platforms like Instagram and TikTok.
-
Upload Schedule: Consistency builds audience trust. Weekly or biweekly posting is ideal for growth.
Post-Publishing Review
Analyzing performance after publishing is crucial for improving your travel vlogs over time.
Review Strategies:
-
Track Engagement Metrics: Monitor views, watch time, likes, shares, and comments. High retention indicates successful editing and storytelling.
-
Collect Feedback: Audience comments can provide insights into what resonates with viewers. Use this feedback to adjust future content.
-
Learn and Adapt: Identify which shots, effects, and editing techniques work best. Apply lessons learned to future vlogs for continuous improvement.
-
Repurpose Content: Short clips, highlights, or scenic shots can be repurposed for Instagram Reels, TikTok, or Shorts.
Pro Tip: Continuous review and adaptation enhance your expertise, credibility, and audience loyalty.
Conclusion
Editing travel vlogs on mobile has never been easier or more accessible. With apps like CapCut Mod APK, creators can produce cinematic, engaging, and professional-quality videos entirely on a smartphone. The key is a structured workflow that includes pre-edit planning, careful clip selection, timeline organization, audio and visual enhancements, and effective publishing strategies.
By following this detailed workflow, you can transform raw footage into immersive travel experiences that captivate your audience. Over time, your consistent quality, attention to detail, and creative storytelling will help establish your authority as a travel vlogger, build trust with viewers, and grow your digital presence.
Whether you are exploring bustling cities, serene beaches, or hidden cultural gems, a mobile editing workflow allows you to share your adventures professionally, efficiently, and creatively.